Single Sign On allows you to configure Transit to use your organizations’ existing user directory as an Identity Provider. Your users will be redirected to your organizations login page and be able to log in with their Active Directory username and password.
Currently Transit Supports Single Sign on with Active Directory Federation Services (ADFS) through SAML 2.0. Support for more Identity providers will be added over the coming weeks.
Before you begin
To configure SAML integration with ADFS you will need access to the AD FS Manager application (typically installed on your ADFS Server) you create a Relying Party Trust.
You assign roles to users by mapping AD groups to Transit Roles. If you want to create groups specifically for assigning roles to your users you may want to create those groups before configuring SSO.
Step by step instructions
1. Configure Identity Provider
In this step you define the basic parameters for this authentication source such as what domain it will serve and what type of SSO server you will be authenticating against.
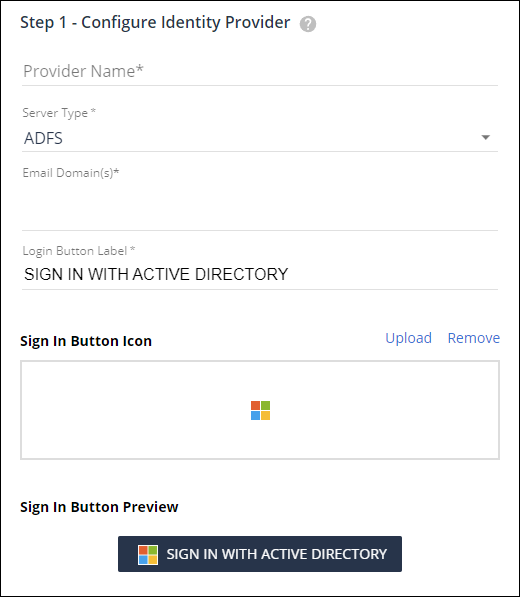
Provider Name is an arbitrary label you assign to the source so you can identify it.
Server Type is where you specify what type of Single Sign On server you are authenticating against. In this case the server type is ADFS,
Email Domain is the list of email domains that will authenticate against this source. Any users who log in from the listed domain(s) will only be allowed to log in using ADFS.
Sign In Button Label is where you can customize the text that appears on the button users will use to log in with this source. The button label will always be displayed in all capital letters to match the other buttons in the app.
Sign In Button Icon allows you to upload a custom icon for the Sign In Button or to remove an icon altogether.
Sign In Button Preview shows you what the Sign In button will look like on the Sign In page.
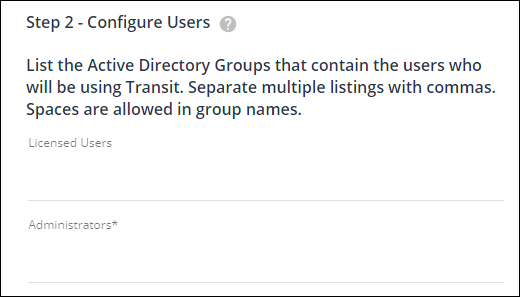
2. Configure Users
Here is where you assign roles to your users by mapping AD groups to Transit roles. When a user logs in if they are are a member of one of the listed groups they will be granted that role. Users who are not members of any of the listed groups can still log in with AD to receive messages and access shared files but will not have any of the capabilities of a licensed user.

List the Active Directory groups that contain the users who you want to have Sender licenses or the Administrator role by listing those groups in the appropriate field. Separate multiple listings with commas. Spaces are allowed in group names.
Licensed Users take up a license and have full access to the application. Administrators are licensed users who can also access the Administration console in Transit.
*Important* Make sure you are a member of at least one group listed for Administrators and that the group name is spelled correctly. It is possible to lock yourself out of the Administration console by misconfiguring Single Sign On.
3. Upload Metadata XML File
To complete this step you need to first download a metadata file from your Identity Provider that contains the information that Transit needs to start authenticating users against that source.
Typically this file is downloaded from your ADFS Server vis the following url:
https://YourServerUrl/FederationMetadata/2007-06/FederationMetadata.xml
Once you download that file simply upload it here.
4. Apply Changes
You need to commit all the information from steps 1 through 3 before continuing. Once Applied you can download the
5. Create Relying Party Trust for Transit in ADFS

This step needs to be performed in the AD FS Manager application for your Active Directory Federation Services. The Relying Party Trust establishes the Trust relationship between ADFS and Transit as well as which ADFS properties are available to the Transit application. The instructions linked to in this step will walk you through the steps that need to be performed in ADFS

- Open the AD FS Management Console and click on Add Relying Party Trust from the Action Menu on the right.
- Leave Claims Aware Selected and click on Start
- Select Import data about the relying party trust and upload the metadata file from step 4
- Specify a Display Name and add any Notes such as a description for this rule and then hit next
- For Choose Access Control Policy accept the defaults and click Next
- For Ready to Add Trust accept the defaults and click Next
- Under Finish leave Configure claims issuance policy and click Finish
- In the Edit Claims Issuance Policy screen click Add Rule…
- In the Select Rule Template screen make sure Send LDAP Attributes as Claims is selected
- In the Edit Rule screen give this rule a name and make sure the Attribute Store is set to Active Directory. Then assign LDAP Mappings as shown:
- User-Principal-Name <-> Name ID
- E-Mail-Addresses <-> E-Mail Address
- Given-Name <-> Given Name
- Surname <-> Surname
- Token-Groups – Unqualified Names <-> Role
6. Test SSO Sign In
It is a good idea to test your source before continuing. The Test Source button will take you to your Organizations ADFS Login page. Once you log in it will tell you if the login succeeded or failed and will provide diagnostic information in either case.
7. Publish SSO Provider
The final step is to publish this Provider. Once published it will show on the Transit login page and be available for your users to authenticate against. While unpublished you can still configure and test the source but it will not be available to users for authentication.
